Category Archives: Backend
ASP.NET Core使用EF Core操作MySql数据库
ASP.NET Core操作MySql数据库, 这样整套环境都可以布署在Linux上 使用微软的 Microsoft.EntityFrameworkCore(2.1.4) 和MySql出的 MySql.Data.EntityFrameworkCore(8.0.13) 软件版本 Asp.net Core:2.1 MySql:5.6 项目结构 Snai.Mysql 是 Asp.net core 2.0 Api网站,Database 下的是MySql建库建表脚本 项目实现 一、MySql 建库建表 使用 Database下的 mysql 建库 表 主键 索引.sql 脚本建库建表,脚本如下:
|
1 2 3 4 5 6 7 8 9 10 11 12 |
CREATE DATABASE alan CHARACTER SET utf8 COLLATE utf8_general_ci; USE alan; CREATE TABLE student( id INT AUTO_INCREMENT PRIMARY KEY, -- 自增列需为主键 `name` NVARCHAR(32) NOT NULL DEFAULT '', sex TINYINT NOT NULL DEFAULT 1, -- 0 男生,1 女生,2 保密 age INT NOT NULL DEFAULT 0 ); ALTER TABLE student ADD INDEX ix_student_name(`name`) -- UNIQUE INDEX 唯一索引 |
建库时加上 CHARACTER SET utf8 COLLATE utf8_general_ci 代码,设置数据库字符集为 utf8,配合程序的数据库连接串加上 CharSet=utf8,防止中文保存时乱码 如果建库时不是utf8,就把字符集改为utf8 二、EF Core 连接操作 MySql 数据库 1、新建项目,添加EF Core 和 MySql驱动依赖项 新建 asp.net core api 网站程序,NuGet 添加依赖项 Microsoft.EntityFrameworkCore.Tools(2.1.4) 和 MySql.Data.EntityFrameworkCore(8.0.13) 包 2、添加实体类Student和数据库上下文 新建 Entities 目录,在,根据表及字段,在目录下新建 Student 实体类,在类上加 [Table("student")] 表名、属性上加[Column("id")] 字段名等与表对应,代码如下:
|
1 2 3 4 5 6 7 8 9 10 11 12 13 14 15 16 17 18 19 20 21 22 23 24 |
using System; using System.Collections.Generic; using System.ComponentModel.DataAnnotations.Schema; using System.Linq; using System.Threading.Tasks; namespace Snai.Mysql.Entities { [Table("student")] public class Student { [Column("id")] public int ID { get; set; } [Column("name")] public string Name { get; set; } [Column("sex")] public byte Sex { get; set; } [Column("age")] public int Age { get; set; } } } |
在根目录下加上 DataAccess 目录做为数据库操作目录,在该目录下加上 Base 目录做数据库上下文目录 在 Base 目录下新建 AlanContext 上下文类,继承 DbContext 类,通过构造函数注入数据库连接,添加 DbSet<Student> 实体属性,代码如下:
|
1 2 3 4 5 6 7 8 9 10 11 12 13 14 15 16 17 18 |
using Microsoft.EntityFrameworkCore; using Snai.Mysql.Entities; using System; using System.Collections.Generic; using System.Linq; using System.Threading.Tasks; namespace Snai.Mysql.DataAccess.Base { public class AlanContext:DbContext { public AlanContext(DbContextOptions<AlanContext> options) : base(options) { } public DbSet<Student> Student { get; set; } } } |
3、添、删、改、查 数据库记录 在 […]
View Details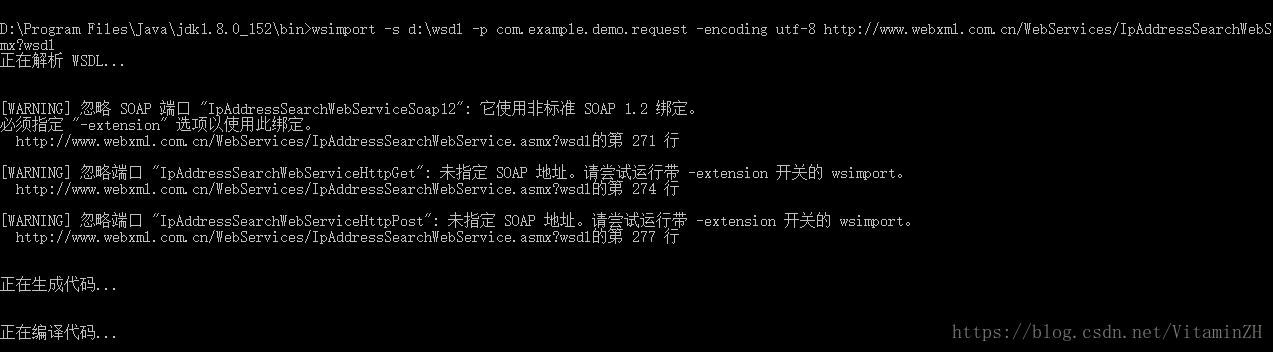
Springboot调用soap webservice(Client)
1.使用jdk自带的webservice工具wsimport生成相关类 测试wsdl http://www.webxml.com.cn/WebServices/IpAddressSearchWebService.asmx?wsdl
|
1 |
wsimport -s d:\wsdl -p com.example.demo.request -encoding utf-8 http://www.webxml.com.cn/WebServices/IpAddressSearchWebService.asmx?wsdl |
-s 存储目录; -p 包名; -encoding 文件编码,默认会采用操作系统编码,中文为gbk,建议使用utf-8; 2.构建相关的配置类及测试方法
|
1 2 3 4 5 6 7 8 |
@Configuration public class IpConfig { @Bean public IpAddressSearchWebServiceSoap webService(){ return new IpAddressSearchWebService().getIpAddressSearchWebServiceSoap(); } } |
|
1 2 3 4 5 6 7 8 9 10 11 12 13 14 15 16 17 18 |
@SpringBootApplication @RestController @RequestMapping("/soap") public class DemoApplication { @Autowired private IpAddressSearchWebServiceSoap soap; public static void main(String[] args) { SpringApplication.run(DemoApplication.class, args); } @RequestMapping("/{ip}") public ArrayOfString searchIp(@PathVariable("ip") String ip) { ArrayOfString response = soap.getCountryCityByIp(ip); return response; } } |
from:https://blog.csdn.net/VitaminZH/article/details/81123571
View Detailsc# dynamic动态类型和匿名类
dynamic类型 简单示例 dynamic expando = new System.Dynamic.ExpandoObject(); //动态类型字段 可读可写 expando.Id = 1; expando.Name = "Test"; string json = Utils.ConvertJson.JsonEncode(expando); //输出{Id:1,Name:’Test'} //动态添加字段 List<string> fieldList = new List<string>() { "Name","Age","Sex"}; //From config or db dynamic dobj = new System.Dynamic.ExpandoObject(); var dic = (IDictionary<string, object>)dobj; foreach (var fieldItem in fieldList) { dic[fieldItem] = "set "+fieldItem+" value"; /*实现类似js里的 动态添加属性的功能 var obj={}; var field="Id"; eval("obj."+field+"=1"); […]
View Details恕我直言,我怀疑你没怎么用过枚举
我们是否一样? 估计很多小伙伴(也包括我自己)都有这种情况,在自学Java语言看书时,关于枚举enum这一块的知识点可能都有点 “轻敌” ,觉得这块内容非常简单,一带而过,而且在实际写代码过程中也不注意运用。 是的,我也是这样!直到有一天我提的代码审核没过,被技术总监一顿批,我才重新拿起了《Java编程思想》,把枚举这块的知识点重新又审视了一遍。 为什么需要枚举 常量定义它不香吗?为啥非得用枚举? 举个栗子,就以B站上传视频为例,视频一般有三个状态:草稿、审核和发布,我们可以将其定义为静态常量:
|
1 2 3 4 5 6 7 8 |
public class VideoStatus { public static final int Draft = 1; //草稿 public static final int Review = 2; //审核 public static final int Published = 3; //发布 } |
对于这种单值类型的静态常量定义,本身也没错,主要是在使用的地方没有一个明确性的约束而已,比如:
|
1 2 3 4 5 |
void judgeVideoStatus( int status ) { ... } |
比如这里的 judgeVideoStatus 函数的本意是传入 VideoStatus 的三种静态常量之一,但由于没有类型上的约束,因此传入任意一个int值都是可以的,编译器也不会提出任何警告。 但是在枚举类型出现之后,上面这种情况就可以用枚举严谨地去约束,比如用枚举去定义视频状态就非常简洁了:
|
1 2 3 |
public enum VideoStatus { Draft, Review, Published } |
而且主要是在用枚举的地方会有更强的类型约束:
|
1 2 3 4 5 6 |
// 入参就有明确类型约束 void judgeVideoStatus( VideoStatus status ) { ... } |
这样在使用 judgeVideoStatus 函数时,入参类型就会受到明确的类型约束,一旦传入无效值,编译器就会帮我们检查,从而规避潜在问题。 除此之外,枚举在扩展性方面比普常量更方便、也更优雅。 重新系统认识一下枚举 还是拿前文《答应我,别再if/else走天下了可以吗》中的那个例子来说:比如,在后台管理系统中,肯定有用户角色一说,而且角色一般都是固定的,适合定义成一个枚举:
|
1 2 3 4 5 6 7 8 |
public enum UserRole { ROLE_ROOT_ADMIN, // 系统管理员 ROLE_ORDER_ADMIN, // 订单管理员 ROLE_NORMAL // 普通用户 } |
接下来我们就用这个UserRole为例来说明枚举的所有基本用法:
|
1 2 3 4 5 6 7 8 9 10 11 12 13 14 15 16 17 18 19 20 21 22 23 24 25 26 27 28 29 30 31 32 |
UserRole role1 = UserRole.ROLE_ROOT_ADMIN; UserRole role2 = UserRole.ROLE_ORDER_ADMIN; UserRole role3 = UserRole.ROLE_NORMAL; // values()方法:返回所有枚举常量的数组集合 for ( UserRole role : UserRole.values() ) { System.out.println(role); } // 打印: // ROLE_ROOT_ADMIN // ROLE_ORDER_ADMIN // ROLE_NORMAL // ordinal()方法:返回枚举常量的序数,注意从0开始 System.out.println( role1.ordinal() ); // 打印0 System.out.println( role2.ordinal() ); // 打印1 System.out.println( role3.ordinal() ); // 打印2 // compareTo()方法:枚举常量间的比较 System.out.println( role1.compareTo(role2) ); //打印-1 System.out.println( role2.compareTo(role3) ); //打印-2 System.out.println( role1.compareTo(role3) ); //打印-2 // name()方法:获得枚举常量的名称 System.out.println( role1.name() ); // 打印ROLE_ROOT_ADMIN System.out.println( role2.name() ); // 打印ROLE_ORDER_ADMIN System.out.println( role3.name() ); // 打印ROLE_NORMAL // valueOf()方法:返回指定名称的枚举常量 System.out.println( UserRole.valueOf( "ROLE_ROOT_ADMIN" ) ); System.out.println( UserRole.valueOf( "ROLE_ORDER_ADMIN" ) ); System.out.println( UserRole.valueOf( "ROLE_NORMAL" ) ); |
除此之外,枚举还可以用于switch语句中,而且意义更加明确:
|
1 2 3 4 5 6 7 8 9 10 11 12 |
UserRole userRole = UserRole.ROLE_ORDER_ADMIN; switch (userRole) { case ROLE_ROOT_ADMIN: // 比如此处的意义就非常清晰了,比1,2,3这种数字好! System.out.println("这是系统管理员角色"); break; case ROLE_ORDER_ADMIN: System.out.println("这是订单管理员角色"); break; case ROLE_NORMAL: System.out.println("这是普通用户角色"); break; } |
自定义扩充枚举 上面展示的枚举例子非常简单,仅仅是单值的情形,而实际项目中用枚举往往是多值用法。 比如,我想扩充一下上面的UserRole枚举,在里面加入 角色名 — 角色编码 的对应关系,这也是实际项目中常用的用法。 这时候我们可以在枚举里自定义各种属性、构造函数、甚至各种方法:
|
1 2 3 4 5 6 7 8 9 10 11 12 13 14 15 16 17 18 19 20 21 22 23 24 25 26 27 28 29 30 31 32 33 34 35 36 37 38 39 40 |
public enum UserRole { ROLE_ROOT_ADMIN( "系统管理员", 000000 ), ROLE_ORDER_ADMIN( "订单管理员", 100000 ), ROLE_NORMAL( "普通用户", 200000 ), ; // 以下为自定义属性 private final String roleName; //角色名称 private final Integer roleCode; //角色编码 // 以下为自定义构造函数 UserRole( String roleName, Integer roleCode ) { this.roleName = roleName; this.roleCode = roleCode; } // 以下为自定义方法 public String getRoleName() { return this.roleName; } public Integer getRoleCode() { return this.roleCode; } public static Integer getRoleCodeByRoleName( String roleName ) { for( UserRole enums : UserRole.values() ) { if( enums.getRoleName().equals( roleName ) ) { return enums.getRoleCode(); } } return null; } } |
从上述代码可知,在enum枚举类中完全可以像在普通Class里一样声明属性、构造函数以及成员方法。 枚举 + 接口 = ? 比如在我的前文《答应我,别再if/else走天下了可以吗》中讲烦人的if/else消除时,就讲过如何通过让枚举去实现接口来方便的完成。 这地方不妨再回顾一遍: 什么角色能干什么事,这很明显有一个对应关系,所以我们首先定义一个公用的接口RoleOperation,表示不同角色所能做的操作:
|
1 2 3 |
public interface RoleOperation { String op(); // 表示某个角色可以做哪些op操作 } |
接下来我们将不同角色的情况全部交由枚举类来做,定义一个枚举类RoleEnum,并让它去实现RoleOperation接口:
|
1 2 3 4 5 6 7 8 9 10 11 12 13 14 15 16 17 18 19 20 21 22 23 24 25 26 |
public enum RoleEnum implements RoleOperation { // 系统管理员(有A操作权限) ROLE_ROOT_ADMIN { @Override public String op() { return "ROLE_ROOT_ADMIN:" + " has AAA permission"; } }, // 订单管理员(有B操作权限) ROLE_ORDER_ADMIN { @Override public String op() { return "ROLE_ORDER_ADMIN:" + " has BBB permission"; } }, // 普通用户(有C操作权限) ROLE_NORMAL { @Override public String op() { return "ROLE_NORMAL:" + " has CCC permission"; } }; } |
这样,在调用处就变得异常简单了,一行代码就行了,根本不需要什么if/else:
|
1 2 3 4 5 6 |
public class JudgeRole { public String judge( String roleName ) { // 一行代码搞定!之前的if/else灰飞烟灭 return RoleEnum.valueOf(roleName).op(); } } |
而且这样一来,以后假如我想扩充条件,只需要去枚举类中加代码即可,而不用改任何老代码,非常符合开闭原则! 枚举与设计模式 什么?枚举还能实现设计模式? 是的!不仅能而且还能实现好几种! 1、单例模式
|
1 2 3 4 5 6 7 8 9 10 11 12 13 14 15 16 17 18 19 20 21 22 23 24 25 26 27 28 |
public class Singleton { // 构造函数私有化,避免外部创建实例 private Singleton() { } //定义一个内部枚举 public enum SingletonEnum{ SEED; // 唯一一个枚举对象,我们称它为“种子选手”! private Singleton singleton; SingletonEnum(){ singleton = new Singleton(); //真正的对象创建隐蔽在此! } public Singleton getInstnce(){ return singleton; } } // 故意外露的对象获取方法,也是外面获取实例的唯一入口 public static Singleton getInstance(){ return SingletonEnum.SEED.getInstnce(); // 通过枚举的种子选手来完成 } } |
2、策略模式 这个也比较好举例,比如用枚举就可以写出一个基于策略模式的加减乘除计算器
|
1 2 3 4 5 6 7 8 9 10 11 12 13 14 15 16 17 18 19 20 21 22 23 24 25 26 27 28 29 30 31 32 33 34 35 36 37 38 39 40 41 42 43 |
public class Test { public enum Calculator { ADDITION { public Double execute( Double x, Double y ) { return x + y; // 加法 } }, SUBTRACTION { public Double execute( Double x, Double y ) { return x - y; // 减法 } }, MULTIPLICATION { public Double execute( Double x, Double y ) { return x * y; // 乘法 } }, DIVISION { public Double execute( Double x, Double y ) { return x/y; // 除法 } }; public abstract Double execute(Double x, Double y); } public static void main(String[] args) { System.out.println( Calculator.ADDITION.execute( 4.0, 2.0 ) ); // 打印 6.0 System.out.println( Calculator.SUBTRACTION.execute( 4.0, 2.0 ) ); // 打印 2.0 System.out.println( Calculator.MULTIPLICATION.execute( 4.0, 2.0 ) ); // 打印 8.0 System.out.println( Calculator.DIVISION.execute( 4.0, 2.0 ) ); // 打印 2.0 } } |
专门用于枚举的集合类 我们平常一般习惯于使用诸如:HashMap 和 HashSet等集合来盛放元素,而对于枚举,有它专门的集合类:EnumSet和EnumMap 1、EnumSet EnumSet 是专门为盛放枚举类型所设计的 Set 类型。 还是举例来说,就以文中开头定义的角色枚举为例:
|
1 2 3 4 5 6 7 8 |
public enum UserRole { ROLE_ROOT_ADMIN, // 系统管理员 ROLE_ORDER_ADMIN, // 订单管理员 ROLE_NORMAL // 普通用户 } |
比如系统里来了一批人,我们需要查看他是不是某个角色中的一个:
|
1 2 3 4 5 6 7 8 9 10 11 12 13 14 15 |
// 定义一个管理员角色的专属集合 EnumSet<UserRole> userRolesForAdmin = EnumSet.of( UserRole.ROLE_ROOT_ADMIN, UserRole.ROLE_ORDER_ADMIN ); // 判断某个进来的用户是不是管理员 Boolean isAdmin( User user ) { if( userRoles.contains( user.getUserRole() ) ) return true; return false; } |
2、EnumMap 同样,EnumMap 则是用来专门盛放枚举类型为key的 Map 类型。 比如,系统里来了一批人,我们需要统计不同的角色到底有多少人这种的话:
|
1 2 3 4 5 6 7 8 9 10 |
Map<UserRole,Integer> userStatisticMap = new EnumMap<>(UserRole.class); for ( User user : userList ) { Integer num = userStatisticMap.get( user.getUserRole() ); if( null != num ) { userStatisticMap.put( user.getUserRole(), num+1 ); } else { userStatisticMap.put( user.getUserRole(), 1 ); } } |
用EnumMap可以说非常方便了。 总 结 小小的枚举就玩出这么多的花样,不过好在探索和总结的过程还挺有意思的,也复习了很多知识,慢慢来吧。 from:https://my.oschina.net/hansonwang99/blog/3196498
View DetailsEvent filter with query "SELECT * FROM __InstanceModi
问题描述: Details -Event filter with query "SELECT * FROM __InstanceModificationEvent WITHIN 60 WHERE TargetInstance ISA "Win32_Processor" AND TargetInstance.LoadPercentage > 99" could not be reactivated in namespace "//./root/CIMV2" because of error 0x80041003. Events cannot be delivered through this filter until the problem is corrected. 解决方案: http://go.microsoft.com/?linkid=9775756 http://download.microsoft.com/download/3/9/D/39DF4B56-9D3A-4645-AC11-803043ED4214/MicrosoftFixit50688.msi 方案详解: http://support.microsoft.com/kb/2545227/en-us#FixItForMeAlways from:https://www.cnblogs.com/heweijian/p/6781382.html
View Details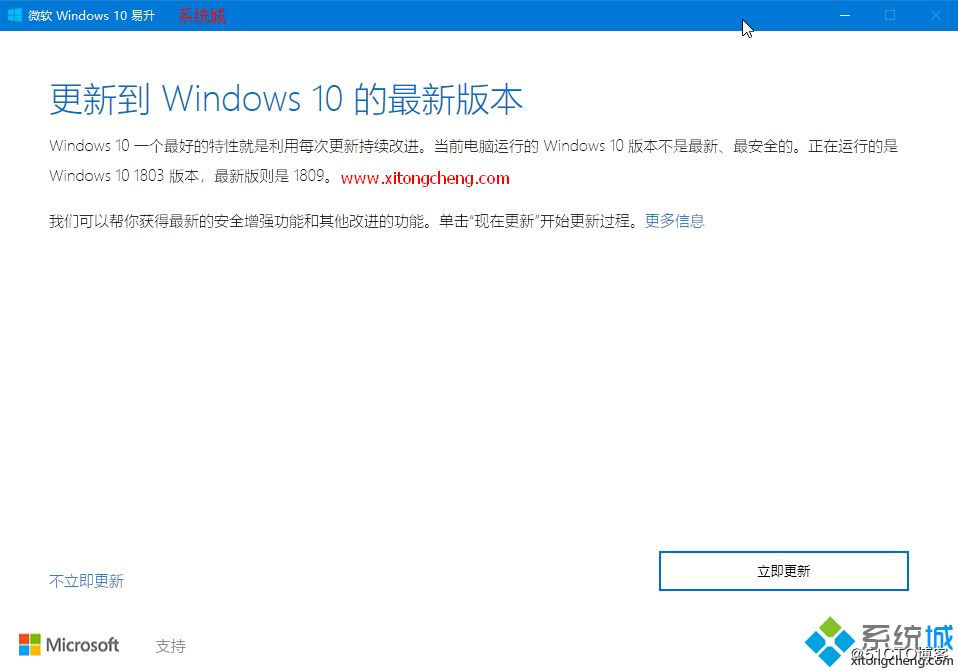
win10怎么更新到1809正式版 升级windows10方法
win10 怎么更新? 升级win10 1809须知: 1、必须保证C盘有10G以上的可用空间,是剩余可用的硬盘容量,如果不足,需要自己清理c盘垃圾 2、必须保证一直通电,如果是笔记本电脑,建议不要用电池,主要怕你电量不够,直接连接电源升级 方法一:windows更新 1、首先保证你的win10是最新版的win10 1803,如果不是可能需要先更新达到1803,才能获取win10 1809推送; 2、如果已经是1803,则依次点击开始—设置—windows更新—检查更新,就会显示有更新可用,针对windows 10的功能更新,版本1809,之后就会自动下载、安装,后面就是漫长的更新配置过程。 方法二:windows10易升 1、直接下载windows10易升最新版,双击打开; 2、自动检测电脑环境以及当前系统版本,提示最新版是win10 1809,点击【立即更新】,后面就是漫长的下载、更新、配置过程。 方法三:win10 1809镜像升级 直接下载win10 1809 iso镜像,手动升级安装 镜像下载地址及安装方法详看:win10 1809正式版iso镜像下载 以上就是win10更新1809正式版的三种方法,如果你没有接收到win10 1809更新推送,会议参考本文提供的方法来升级win10 1809。 from:https://blog.51cto.com/rainy0426/2406685
View Details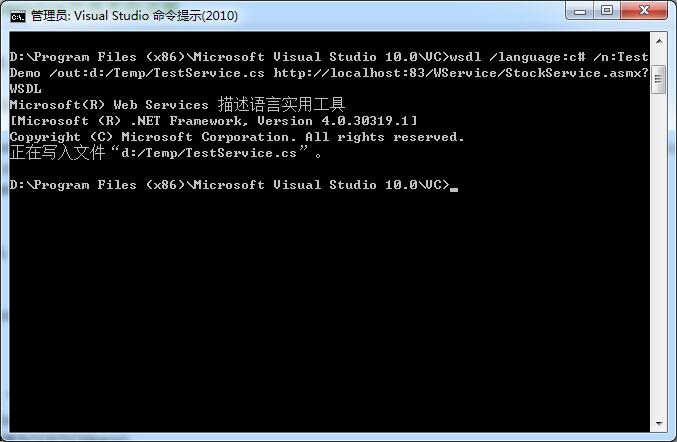
解析利用wsdl.exe生成webservice代理类的详解
利用wsdl.exe生成webservice代理类: 根据提供的wsdl生成webservice代理类 1、开始->程序->Visual Studio 2010 命令提示 2、输入如下红色标记部分 D:/Program Files/Microsoft Visual Studio 8/VC>wsdl /language:c# /n:TestDemo /out:d:/Temp/TestService.cs D:/Temp/TestService.wsdl 在d:/Temp下就会产生一个TestService.cs 文件 注意:D:/Temp/TestService.wsdl 是wsdl路径,可以是url路径:http://localhost/Temp/Test.asmx?wsdl wsdl参数说明: wsdl.exe <选项> <URL 或路径> <URL 或路径> … – 选项 – <URL 或路径> – 指向 WSDL 协定、XSD 架构或 .discomap 文档的 URL 或路径。 /nologo 取消显示版权标志。 /language:<language> 用于生成的代理类的语言。请从“CS”、“VB”、“JS”、“VJS”、 “CPP”中选择,或者为实现 System.CodeDom.Compiler.CodeDomProvider 的类提供一个完全限定的名称。默认语言为“CS”(CSharp)。 缩写形式为“/l:”。 /sharetypes 打开类型共享功能。此功能针对不同服务之间共享 的相同类型(命名空间、名称和网络签名必须相同) 创建一个具有单一类型定义的代码文件。 请使用 http:// URLs 作为命令行参数来引用 服务,或为本地文件创建一个 discomap 文档。 /verbose 指定 /sharetypes 开关时显示额外信息。 缩写形式为“/v”。 /fields 生成字段而非属性。缩写形式为“/f”。 /order 为粒子成员生成显式顺序标识符。 /enableDataBinding 在所有生成的类型上实现 INotifyPropertyChanged 接口, 以启用数据绑定。缩写形式为“/edb”。 /namespace:<namespace> 生成的代理或模板的命名空间。默认命名空间 为全局命名空间。缩写形式为“/n:”。 /out:<fileName|directoryPath> 生成的代理代码的文件名或目录路径。默认文件名是从 […]
View DetailsGDI+中发生一般性错误的解决办法
前言: 今天在做二维码需求的时候,代码运行的时候报的:GDI+中发生一般性错误的解决办法这个错误,这个错误也是第一次遇到,不知道怎么解决,以为是生成二维码的代码错了。最后通过对代码的检查以及查资料进行解决了,原来是少了一个保存二维码图片的文件夹。 这个错误也常在在后台生成图片以及验证码中出现。基本上都是采用下面的几种解决办法 代码中没有物理的文件夹的解决办法: 在调用 Save 方法之前,先判断保存图片的文件夹是否存在,若不存在,则创建,当然也可以手动添加一个
|
1 2 3 4 |
//dirpath:文件路径 if (!Directory.Exists(dirpath)){ Directory.CreateDirectory(dirpath) } |
有保存图片的物理文件夹的解决办法: 给相应的文件夹赋予 NETWORK SERVICE 帐户以写权限 保存的文件已存在并因某种原因被锁定的解决办法: 重启IIS,解除锁定。并在代码中使用 using 语句,确保释放 Image 对象所使用的所有资源 ———————————————— 版权声明:本文为CSDN博主「小灰灰城堡」的原创文章,遵循 CC 4.0 BY-SA 版权协议,转载请附上原文出处链接及本声明。 原文链接:https://blog.csdn.net/GreyCastle/article/details/88411697
View Detailsnginx上传大文件,413错误解决
在nginx里增加了配置。
|
1 2 3 4 |
client_max_body_size 500m; proxy_connect_timeout 600; proxy_read_timeout 600; proxy_send_timeout 600; |
我觉得,应该只用修改client_max_body_size就可以解决问题。 其它几个,设置了并未起作用。其参数意义如下: client_max_body_size 限制请求体的大小,若超过所设定的大小,返回413错误。 client_header_timeout 读取请求头的超时时间,若超过所设定的大小,返回408错误。 client_body_timeout 读取请求实体的超时时间,若超过所设定的大小,返回413错误。 proxy_connect_timeout http请求无法立即被容器(tomcat, netty等)处理,被放在nginx的待处理池中等待被处理。此参数为等待的最长时间,默认为60秒,官方推荐最长不要超过75秒。 proxy_read_timeout http请求被容器(tomcat, netty等)处理后,nginx会等待处理结果,也就是容器返回的response。此参数即为服务器响应时间,默认60秒。 proxy_send_timeout http请求被服务器处理完后,把数据传返回给Nginx的用时,默认60秒。 from:https://www.cnblogs.com/aguncn/p/11189159.html
View Details解决win2008下IIS7的HTTP500错误
造成500错误常见原因有:ASP语法出错、ACCESS数据库连接语句出错、文件引用与包含路径出错、使用了服务器不支持的组件如FSO等。 另外,对于win2008的IIS默认不显示详细出错信息的问题以下就是重点部分了,2008默认它是不会显示详细错误的。 1.打开IIS,点全局设置中的"错误页"(注意必须是全局网站!) 2.右击500错误这一行,单击 “编辑功能设置”. 2.在错误响应中,选第二项的"详细错误" 3.点确定后刷新IE就会显示详细的出错信息. 值得注意的地方:这样设置了,就不能给500内部错误自定义错误页面了。 from:https://blog.csdn.net/lishimin1012/article/details/72956068
View Details