.Net高并发解决思路
首先在windows上安装好Redis,RabbitMQ

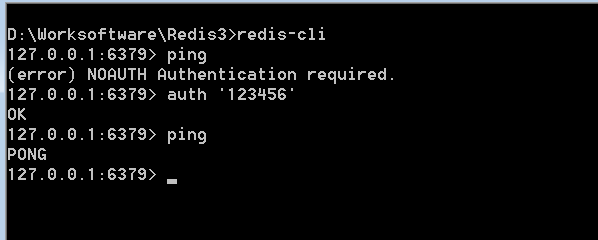
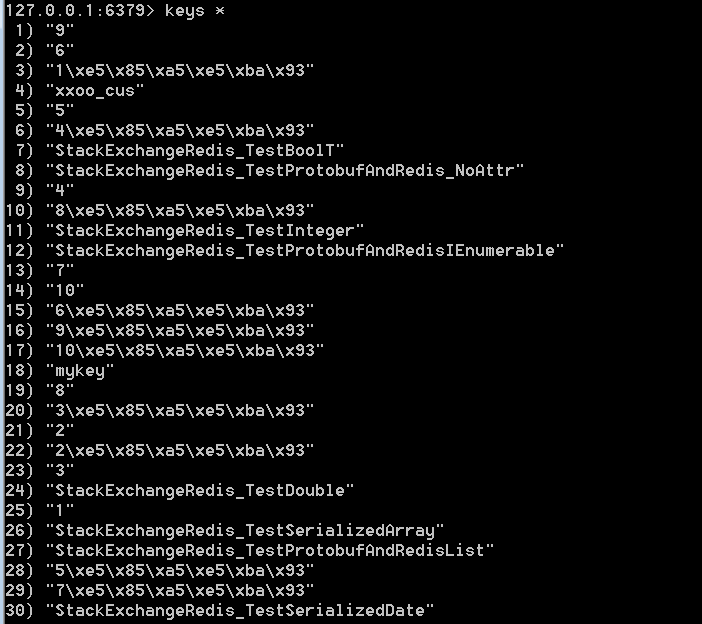
Redis-cli使用示例


ModelContext.cs代码:
|
1 2 3 4 5 6 7 8 9 10 11 12 13 14 15 16 17 18 |
public class ModelContext : DbContext { //您的上下文已配置为从您的应用程序的配置文件(App.config 或 Web.config) //连接字符串。 public ModelContext() : base("name=default") { } public virtual DbSet<Person> Person { get; set; } } public class Person { public int Id { get; set; } public string Id2 { get; set; } public string Name { get; set; } } |
在 Package Manager Console 下运行命令 Enable-Migrations
这个命令将在项目下创建文件夹 Migrations
The Configuration class 这个类允许你去配置如何迁移,对于本文将使用默认的配置(在本文中因为只有一个 Context, Enable-Migrations 将自动对 context type 作出适配);
An InitialCreate migration (本文为201702220232375_20170222.cs)这个迁移之所以存在是因为我们之前用 Code First 创建了数据库, 在启用迁移前,scaffolded migration 里的代码表示在数据库中已经创建的对象,本文中即为表 Person(列 Id 和 Name). 文件名包含一个 timestamp 以便排序(如果之前数据库没有被创建,那么 InitialCreate migration 将不会被创建,相反,当我们第一次调用 Add-Migration 的时候所有表都将归集到一个新的 migration 中)
多个实体锁定同一数据库
当使用 EF6 之前的版本时,只会有一个 Code First Model 被用来生成/管理数据库的 Schema, 这将导致每个数据库只会有一张 __MigrationsHistory 表,从而无法辨别实体与模型的对应关系。
从 EF6 开始,Configuration 类将会包含一个 ContextKey 属性,它将作为每一个 Code First Model 的唯一标识符, __MigrationsHistory 表中一个相应地的列允许来自多个模型(multiple models)的实体共享表(entries),默认情况下这个属性被设置成 context 的完全限定名。
定制化迁移
在 Package Manager Console 中运行命令 Add-Migration XXXXXXXXX
生成的迁移如下
|
1 2 3 4 5 6 7 8 9 10 11 12 13 14 15 16 17 18 19 20 21 |
public partial class _20170222 : DbMigration { public override void Up() { CreateTable( "dbo.People", c => new { Id = c.Int(nullable: false, identity: true), Id2 = c.String(), Name = c.String(), }) .PrimaryKey(t => t.Id); } public override void Down() { DropTable("dbo.People"); } } |
Configuration.cs代码:
|
1 2 3 4 5 6 7 8 9 10 11 12 |
internal sealed class Configuration : DbMigrationsConfiguration<EF.ModelContext> { public Configuration() { AutomaticMigrationsEnabled = false; } protected override void Seed(EF.ModelContext context) { } } |
我们对迁移做些更改:
以下是本项目无关的其他示例:
|
1 2 3 4 5 6 7 8 9 10 11 12 13 14 15 16 17 18 19 20 21 22 23 24 25 26 27 28 29 30 31 32 33 34 35 36 |
namespace MigrationsDemo.Migrations { using System; using System.Data.Entity.Migrations; public partial class AddPostClass : DbMigration { public override void Up() { CreateTable( "dbo.Posts", c => new { PostId = c.Int(nullable: false, identity: true), Title = c.String(maxLength: 200), Content = c.String(), BlogId = c.Int(nullable: false), }) .PrimaryKey(t => t.PostId) .ForeignKey("dbo.Blogs", t => t.BlogId, cascadeDelete: true) .Index(t => t.BlogId) .Index(p => p.Title, unique: true); AddColumn("dbo.Blogs", "Rating", c => c.Int(nullable: false, defaultValue: 3)); } public override void Down() { DropIndex("dbo.Posts", new[] { "Title" }); DropForeignKey("dbo.Posts", "BlogId", "dbo.Blogs"); DropIndex("dbo.Posts", new[] { "BlogId" }); DropColumn("dbo.Blogs", "Rating"); DropTable("dbo.Posts"); } } } |
在 Package Manager Console 中运行命令 Update-Database –Verbose
消费者端,用来把消息队列里的数据写入数据库
MqHelper.cs代码:
|
1 2 3 4 5 6 7 8 9 10 11 12 13 14 15 16 17 18 19 20 21 22 23 24 25 26 27 28 29 30 31 32 |
public class MqHelper { private static IConnection _connection; /// <summary> /// 获取连接对象 /// </summary> /// <returns></returns> public static IConnection GetConnection() { if (_connection != null) return _connection; _connection = GetNewConnection(); return _connection; } public static IConnection GetNewConnection() { //从工厂中拿到实例 本地host、用户admin var factory = new ConnectionFactory() { HostName = "localhost", UserName = "guest", Password = "guest", }; _connection = factory.CreateConnection(); return _connection; } } |
Program.cs代码:
|
1 2 3 4 5 6 7 8 9 10 11 12 13 14 15 16 17 18 19 20 21 22 23 24 25 26 27 28 29 30 31 32 33 34 35 36 37 38 39 40 41 42 43 44 45 46 47 48 49 50 51 52 53 54 55 56 57 58 59 60 61 62 63 64 65 66 67 68 69 70 71 72 73 74 75 76 |
internal class Program { private static void Main(string[] args) { using (var channel = MqHelper.GetConnection().CreateModel()) { //参数有 queue名字 是否持久化 独占的queue(仅供此连接) 不使用时是否自动删除 其他参数 channel.QueueDeclare("NET", true, false, false, null); //我们要告诉服务器从队列里推送消息,因为消息是异步发送的,所以我们需要提供一个回调事件EventingBasicConsumer,用于处理接收到的消息。 //这就是 EventingBasicConsumer.Received 事件处理程序做的事。 var consumber = new EventingBasicConsumer(channel); //QoS = quality-of-service, 顾名思义,服务的质量。 //代码第一个参数是可接收消息的大小的,但是似乎在客户端2.8.6版本中它必须为0,即使:不受限制。 //如果不输0,程序会在运行到这一行的时候报错,说还没有实现不为0的情况。 //第二个参数是处理消息最大的数量。举个例子,如果输入1,那如果接收一个消息,但是没有应答,则客户端不会收到下一个消息,消息只会在队列中阻塞。 //如果输入3,那么可以最多有3个消息不应答,如果到达了3个,则发送端发给这个接收方得消息只会在队列中,而接收方不会有接收到消息的事件产生。 //总结说,就是在下一次发送应答消息前,客户端可以收到的消息最大数量。 //第三个参数则设置了是不是针对整个Connection的,因为一个Connection可以有多个Channel,如果是false则说明只是针对于这个Channel的。 //Fair dispatch 公平分发 //通过 BasicQos 方法设置prefetchCount = 1。这样RabbitMQ就会使得每个Consumer在同一个时间点最多处理一个Message。换句话说,在接收到该Consumer的ack前,他它不会将新的Message分发给它。 设置方法如下: channel.BasicQos(0, 1, false); consumber.Received += (sender, e) => { try { var user = JsonConvert.DeserializeObject<User>(Encoding.UTF8.GetString(e.Body)); //Redis INCR命令用于将键的整数值递增1。如果键不存在,则在执行操作之前将其设置为0。 如果键包含错误类型的值或包含无法表示为整数的字符串,则会返回错误。此操作限于64位有符号整数。 var flag = RedisHelper.GetRedisClient().Incr(user.Id.ToString()); if (flag == 1) { //用户的第一次请求,为有效请求 //下面开始入库,这里使用List做为模拟 Console.WriteLine(string.Format("{0}标识为{1} {2}", user.Id, flag, user.Name)); var dbContext = new ModelContext(); dbContext.Person.Add(new Person() {Id2 = user.Id.ToString(), Name = user.Name}); Task ts = dbContext.SaveChangesAsync(); ts.Wait(); //添加入库标识 RedisHelper.GetRedisClient().Incr(string.Format("{0}入库", user.Id.ToString())); Console.WriteLine("入库成功"); } //用户的N次请求,为无效请求 channel.BasicAck(e.DeliveryTag, false); // 回发ACK 参数 tag 是否多个 //对message进行确认 } catch (Exception ex) { File.AppendAllText(string.Format("{0}/bin/log.txt", System.AppDomain.CurrentDomain.BaseDirectory), ex.Message); } }; Console.WriteLine("开始工作"); // 如果 channel.BasicConsume 中参数 noAck 设置为 false,必须加上消息确认语句 // Message acknowledgment(消息确认机制作用) //打开应答机制 //no_ack 的用途:确保 message 被 consumer “成功”处理了。 //这里“成功”的意思是,(在设置了 no_ack=false 的情况下)只要 consumer 手动应答了 Basic.Ack ,就算其“成功”处理了。 //情况一:no_ack=true (此时为自动应答) //在这种情况下,consumer 会在接收到 Basic.Deliver + Content-Header + Content-Body 之后,立即回复 Ack 。 //而这个 Ack 是 TCP 协议中的 Ack 。此 Ack 的回复不关心 consumer 是否对接收到的数据进行了处理,当然也不关心处理数据所需要的耗时。 //情况二:no_ack=false (此时为手动应答) //在这种情况下,要求 consumer 在处理完接收到的 Basic.Deliver + Content-Header + Content-Body 之后才回复 Ack 。 //而这个 Ack 是 AMQP 协议中的 Basic.Ack 。此 Ack 的回复是和业务处理相关的,所以具体的回复时间应该要取决于业务处理的耗时。 channel.BasicConsume("NET", false, consumber); Console.ReadKey(); } } } |
模拟并发的MVC网站,写入队列
HomeController.cs代码
|
1 2 3 4 5 6 7 8 9 10 11 12 13 14 15 16 17 18 19 20 21 22 23 24 25 26 27 28 29 30 31 32 33 34 35 36 37 38 |
public class HomeController : Controller { // GET: Controller public ActionResult Index() { return View(); } /// <summary> /// 抢单接口 /// </summary> /// <param name="user"></param> /// <returns></returns> [HttpPost] public ActionResult GrabSingle(User user) { //使用后台任务 //BackgroundJob.Enqueue(() => MqPublish.AddQueue(user)); MqPublish.AddQueue(user); //MqPublish.AddQueue(user); return Json(new { Status = "OK" }); } /// <summary> /// 获取数量 /// </summary> /// <returns></returns> [HttpGet] public async Task<ActionResult> GetCount() { using (var dbcontext = new ModelContext()) { return Json(new { Count = await dbcontext.Person.CountAsync() }, JsonRequestBehavior.AllowGet); } } } |
MqPublish.cs类
|
1 2 3 4 5 6 7 8 9 10 11 12 13 14 15 16 17 18 19 20 21 22 23 24 25 26 27 28 29 30 31 32 |
/// <summary> /// 发布者 /// </summary> public class MqPublish { public const string QueueName = "NET"; public static IList<User> UserList = new List<User>(); /// <summary> /// 添加到队列 /// </summary> public static void AddQueue(User user) { //创建一个channel using (var channel = MqHelper.GetNewConnection().CreateModel()) { //json序列化 var bytes = Encoding.UTF8.GetBytes(JsonConvert.SerializeObject(user)); //channel.basicPublish(exchangeName, routingKey, null, messageBodyBytes); //参数说明: //要发出的交换机名字 //路由关键字 //是否强制(设置为true时,找不到收的人时可以通过returnListener返回) //是否立即(其实rabbitmq不支持) //其他属性 //消息主体 channel.BasicPublish(String.Empty, QueueName, null, bytes); } } } |
RedisHelper.cs代码:
|
1 2 3 4 5 6 7 8 9 10 11 12 13 |
/// <summary> /// Redis帮助类 /// </summary> public class RedisHelper { public static RedisClient GetRedisClient() { return new RedisClient("127.0.0.1", 6379,"123456"); } } |
Index.cshtml内容:
|
1 2 3 4 5 6 7 8 9 10 11 12 13 14 15 16 17 18 19 20 21 22 23 24 25 26 27 28 29 30 31 32 33 34 35 36 37 38 39 40 41 42 43 44 45 46 47 48 49 50 51 52 |
@{ Layout = null; } <!DOCTYPE html> <html> <head> <meta name="viewport" content="width=device-width" /> <title>Index</title> <link href="//cdn.bootcss.com/bootstrap/4.0.0-alpha.6/css/bootstrap.min.css" rel="stylesheet"> <script src="//cdn.bootcss.com/jquery/3.1.1/jquery.min.js"></script> <script> var uarray = [ { Id: 1, Name: "小明" }, { Id: 2, Name: "张三" }, { Id: 3, Name: "李四" }, { Id: 4, Name: "王五" }, { Id: 5, Name: "赵六" }, { Id: 6, Name: "钱八" }, { Id: 7, Name: "小红" }, { Id: 8, Name: "小紫" }, { Id: 9, Name: "小蓝" }, { Id: 10, Name: "老王" } ]; function btnClick() { //构造并发模拟 var flag; for (var i = 0; i < 1000; i++) { flag = parseInt(Math.random() * (9 - 0 + 1) + 0); $.ajax({ type: "post", url: "/Home/GrabSingle", data: uarray[flag] }); } } function GetCount() { $.ajax({ type: "get", url: "/Home/GetCount", dataType: "json", success: function (data) { alert(data.Count + "个"); } }); } </script> </head> <body> <h2>.Net高并发解决思路</h2> <hr /> <button class="btn btn-primary" onclick="btnClick()">点击抢单</button> <button class="btn btn-primary" onclick="GetCount()">查看入库数量</button> </body> </html> |
Startup.cs代码:
|
1 2 3 4 5 6 7 8 9 10 11 12 13 14 15 16 17 18 19 20 21 22 23 24 25 26 27 |
using System; using System.Threading.Tasks; using Hangfire; using Hangfire.MemoryStorage; using Microsoft.Owin; using NetHigh.RabbitMq; using Owin; [assembly: OwinStartup(typeof(NetHigh.Startup))] namespace NetHigh { public partial class Startup { public void Configuration(IAppBuilder app) { GlobalConfiguration.Configuration.UseMemoryStorage(); app.UseHangfireServer(); app.UseHangfireDashboard("/hangfire"); //添加三个后台任务也就是三个consumer //BackgroundJob.Enqueue(() => MqConsumber.ConsumeQueue()); //BackgroundJob.Enqueue(() => MqConsumber.ConsumeQueue()); //BackgroundJob.Enqueue(() => MqConsumber.ConsumeQueue()); } } } |
Web.config
|
1 2 3 4 5 6 7 8 9 10 11 12 13 14 15 16 17 18 19 20 21 22 23 24 |
<?xml version="1.0" encoding="utf-8"?> <configuration> <configSections> <section name="entityFramework" type="System.Data.Entity.Internal.ConfigFile.EntityFrameworkSection, EntityFramework, Version=6.0.0.0, Culture=neutral, PublicKeyToken=b77a5c561934e089" requirePermission="false" /> </configSections> <system.web> <compilation debug="true" targetFramework="4.5" /> <httpRuntime targetFramework="4.5" /> </system.web> <entityFramework> <defaultConnectionFactory type="System.Data.Entity.Infrastructure.LocalDbConnectionFactory, EntityFramework"> <parameters> <parameter value="mssqllocaldb" /> </parameters> </defaultConnectionFactory> <providers> <provider invariantName="System.Data.SqlClient" type="System.Data.Entity.SqlServer.SqlProviderServices, EntityFramework.SqlServer" /> </providers> </entityFramework> <connectionStrings> <add name="default" connectionString="Server=.;User Id=sa;PassWord=123456;DataBase=Person" providerName="System.Data.SqlClient" /> </connectionStrings> </configuration> |
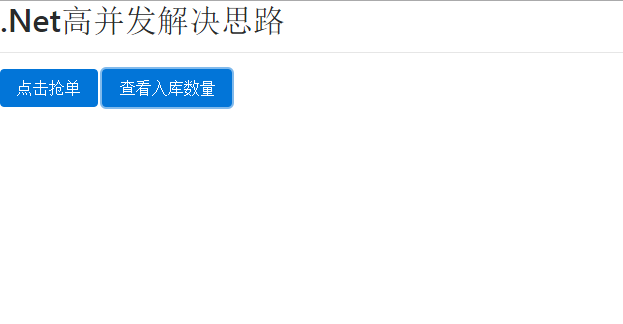
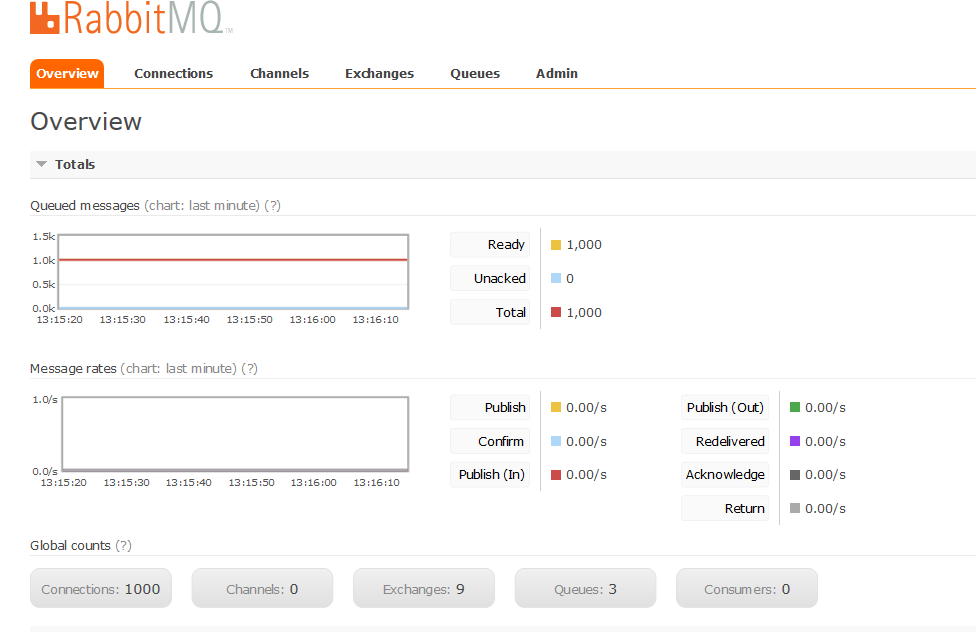
运行结果如图:


运行消费者端(控制台运用程序)


from: https://blog.csdn.net/andrewniu/article/details/82856702